Easy DIY Fleece Tie Blanket: Feeling the warmth all the way into 2023!
December 12, 2022
DIY FLEECE TIE BLANKET
Easy No-Sew Project for Kids and Adults
You’ve admired fleece tie blankets and throws because they are soft and warm. They are the perfect addition to leave in your vehicle in case of an emergency or even to cuddle with if you are the passenger. Instead of going out and buying one, why not make your own?
We have created a step-by-step guide for our Trypster community on making your own DIY Fleece Tie Blanket.
Not many supplies are required and this is a beginner-level DIY anyone could take on! Here are all the things you will need.
Supplies:
Fleece fabric (choose any design or colors you like). We got our fleece at Fabricland but you can also conveniently order through Amazon.
Sharp scissors or a rotary cutter and cutting mat
Measuring tape
Pen/Pencil to mark fabric
Step 1:Choose the Fabric
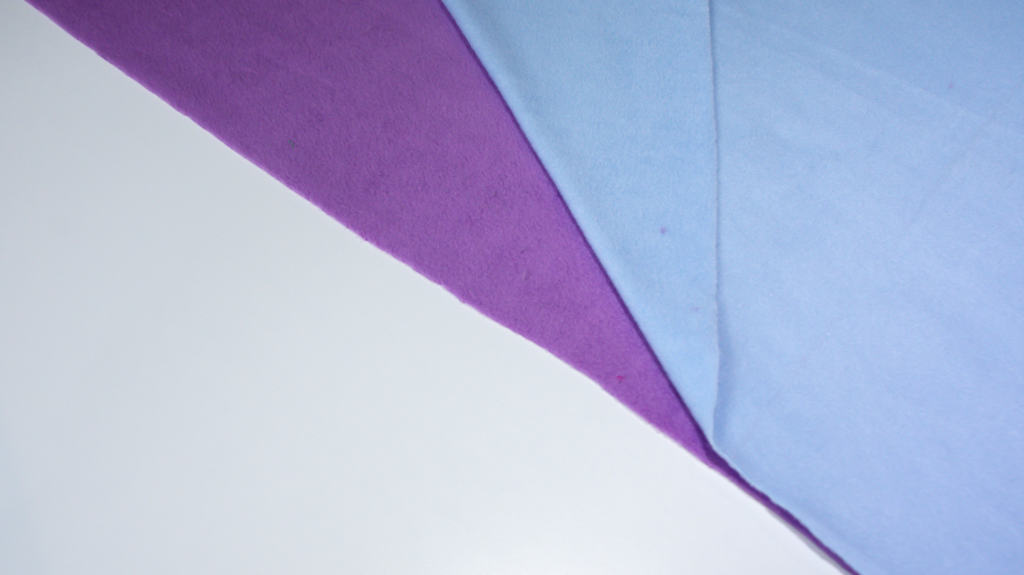
Head to your local fabric store or use something you already have at home! We recommend choosing a print for one side and a contrasting or matching solid fleece for the other. Both fabrics should be cut to the same size based on the measurements of the blanket you’re looking to create.
Depending on what size of blanket you’d like to create, you may need to adjust the amount of fleece that you purchase.
To create a throw blanket size, you’ll need about 1.5 – 3 yards (1.3 – 2.7 meters)
To create a twin-size blanket, purchase about 2.5 – 3 yards (2.3 – 2.7 meters)
For the size you see in our photos, we purchased 2.5 yards of each fabric!
Step 2:Line Up the Two Pieces of Fabric
Line up the two fabrics on a flat surface, with the right sides facing out. If you’re not sure which side is out, we’ve got a tip to help: anti-pill solids are fuzzy on the right side. However, regular prints can be hard to tell so use the side that appeals to you.
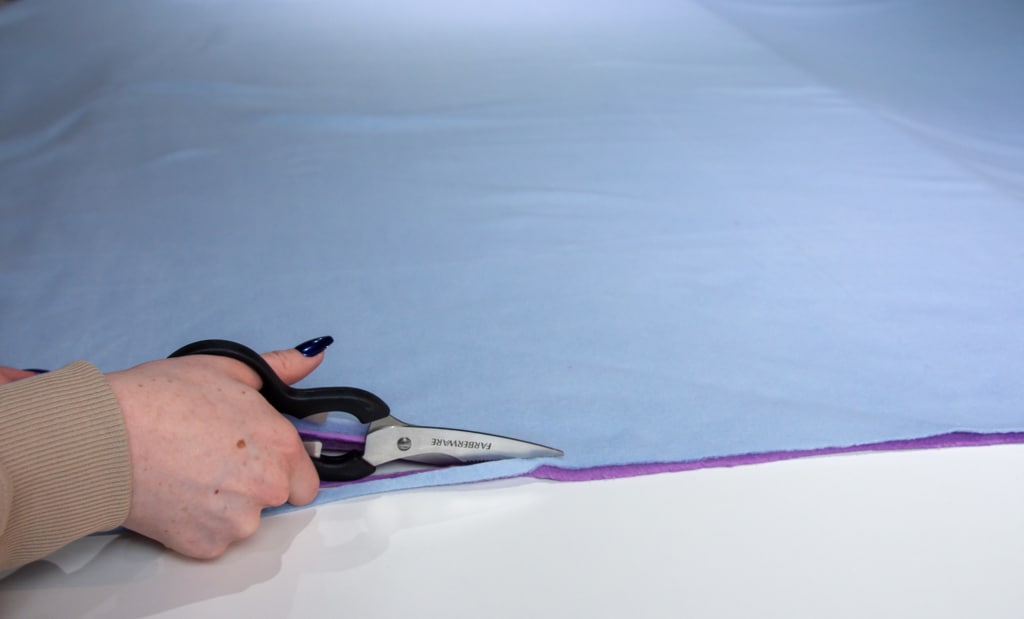
Step 3:Trim to the Same Size
Still on the flat surface, trim the two pieces so that they are the same size.
Tip! If you’re making a square blanket is square you can rotate the top piece of fabric to have the stretch go in the opposite direction of the bottom piece to give a more stable blanket.
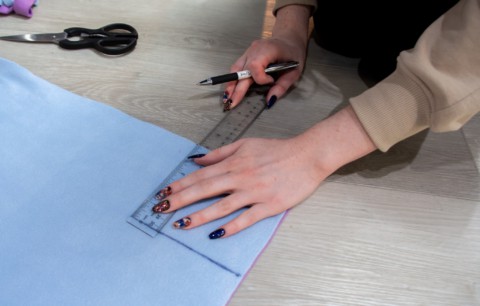
Step 4:Cut Out the Corners
Cut out a 5-inch square from each of the four corners. Keep the two pieces of fabric together and cut them at the same time.
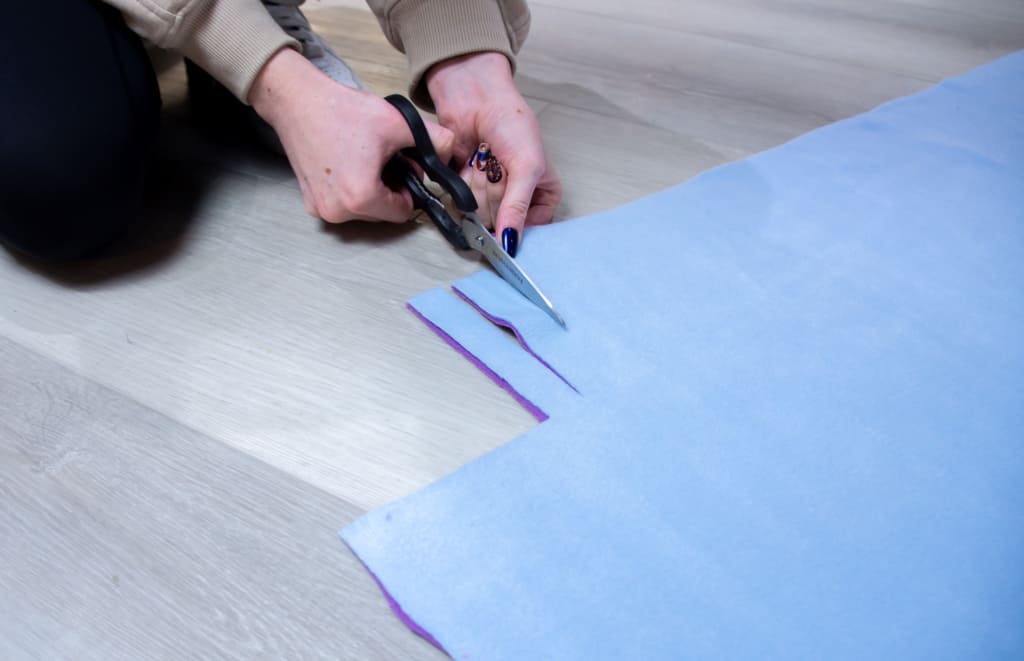
Step 5:Cutting the Fringe
Cut the fringe on all four sides of the blanket. To do this, cut through both layers of fabric at the same time. Fringe pieces should be a little wider than the width of your finger. To get the fringe length we have here, cut each piece in from the edge about 5 inches. If you have a yardstick, you can lay it across the fabric, 5 inches from the edge to make sure the fringe is the same length across each edge.
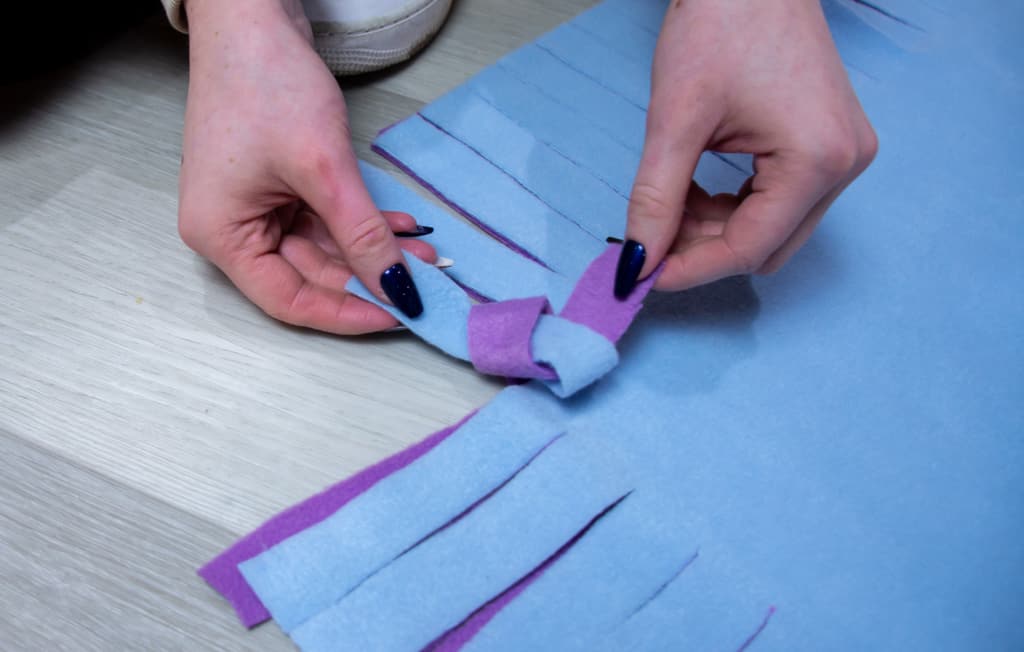
Step 6: Begin Tying Knots
Leave your blanket laying flat on the surface, with the fringed pieces lined up. It is easier to start tying from the left edge and work to the right, going around the blanket. If you are left-handed, you may find it easier to start on the right and work left.
You can tie the knots in two styles:
How you would tie off a balloon
Like you tie a shoelace. This is what we did! What we found best was tying each piece in a double knot.
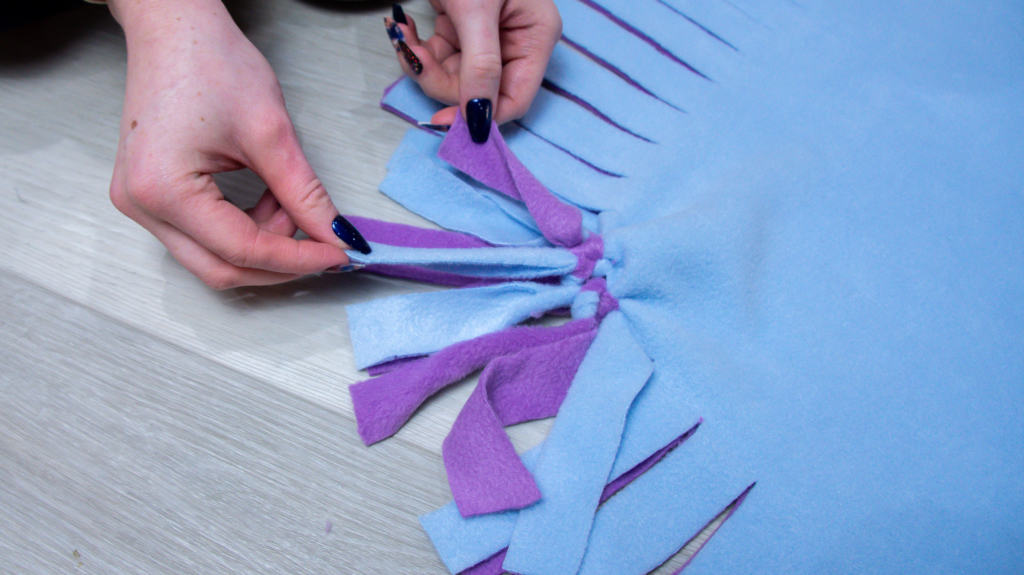
Step 7: Continue Around the Blanket
Tie all the fringes together on all four sides of the blanket. After this, you are finished! All the knots should be snug up to the blanket, but not too tight. The finished blanket should lay flat.
We hope you enjoy your fleece tie blanket and stay warm! Keep this in your car for emergencies or passengers, or even add it to your home for a cozy movie blanket! These can also make a great gift this holiday season!
We hope you have fun creating this fun project! If you’re looking for more holiday content, make sure to check out our top 6 tips to throw the best holiday party of the year! If you recreate this DIY fleece tie blanket, please tag us on Instagram so we can see how it turns out! Happy Holidays!