Who doesn’t love candles? They make the perfect relaxation gift, and they can be made in big batches! When you DIY candles, it can be easier on the budget as well, coming in at about $5 per candle.
Even better, this is a perfect gift to have on hand, just in case you have a last-minute event or get-together that requires a gift. The only thing that should be on your mind is getting there safely!
We created this tutorial to help our community of Trypsters tackle this quick and easy gift – as you can see, we tried it ourselves and are serving up our best tips! We really learned a lot creating these DIY candles. Our DIY candle recipe makes 24, 6 oz candles.
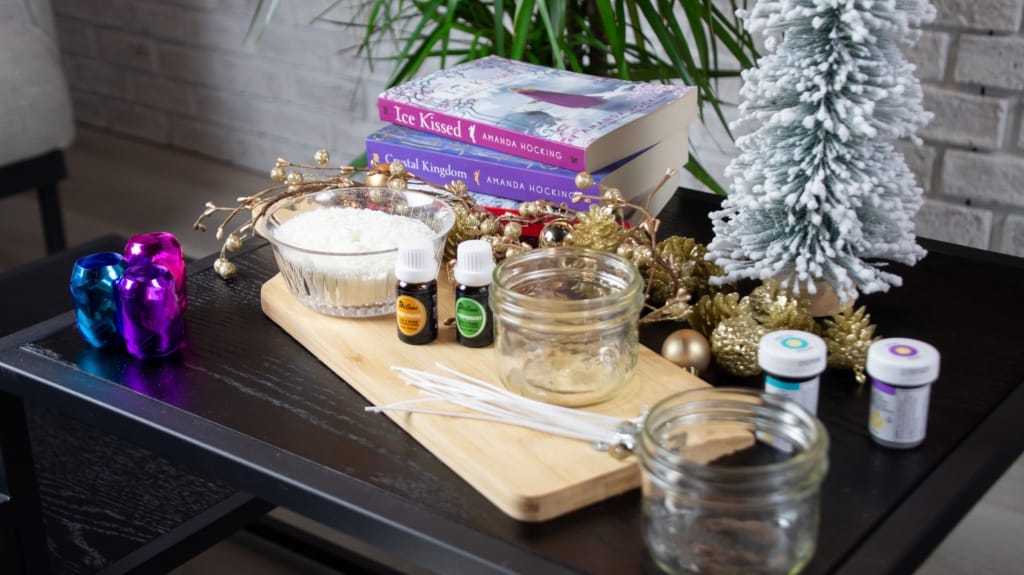
To make scented candles, you need a few simple ingredients and some supplies you may already have in your house.
Supplies:
Soy wax flakes (calculate the amount of wax you’ll need by multiplying the number of candles being made by the number of ounces each will be. Then divide your total by 20!) What we did: (24 candles x 6 oz mason jars)/20= 7.2 lbs of wax needed in total
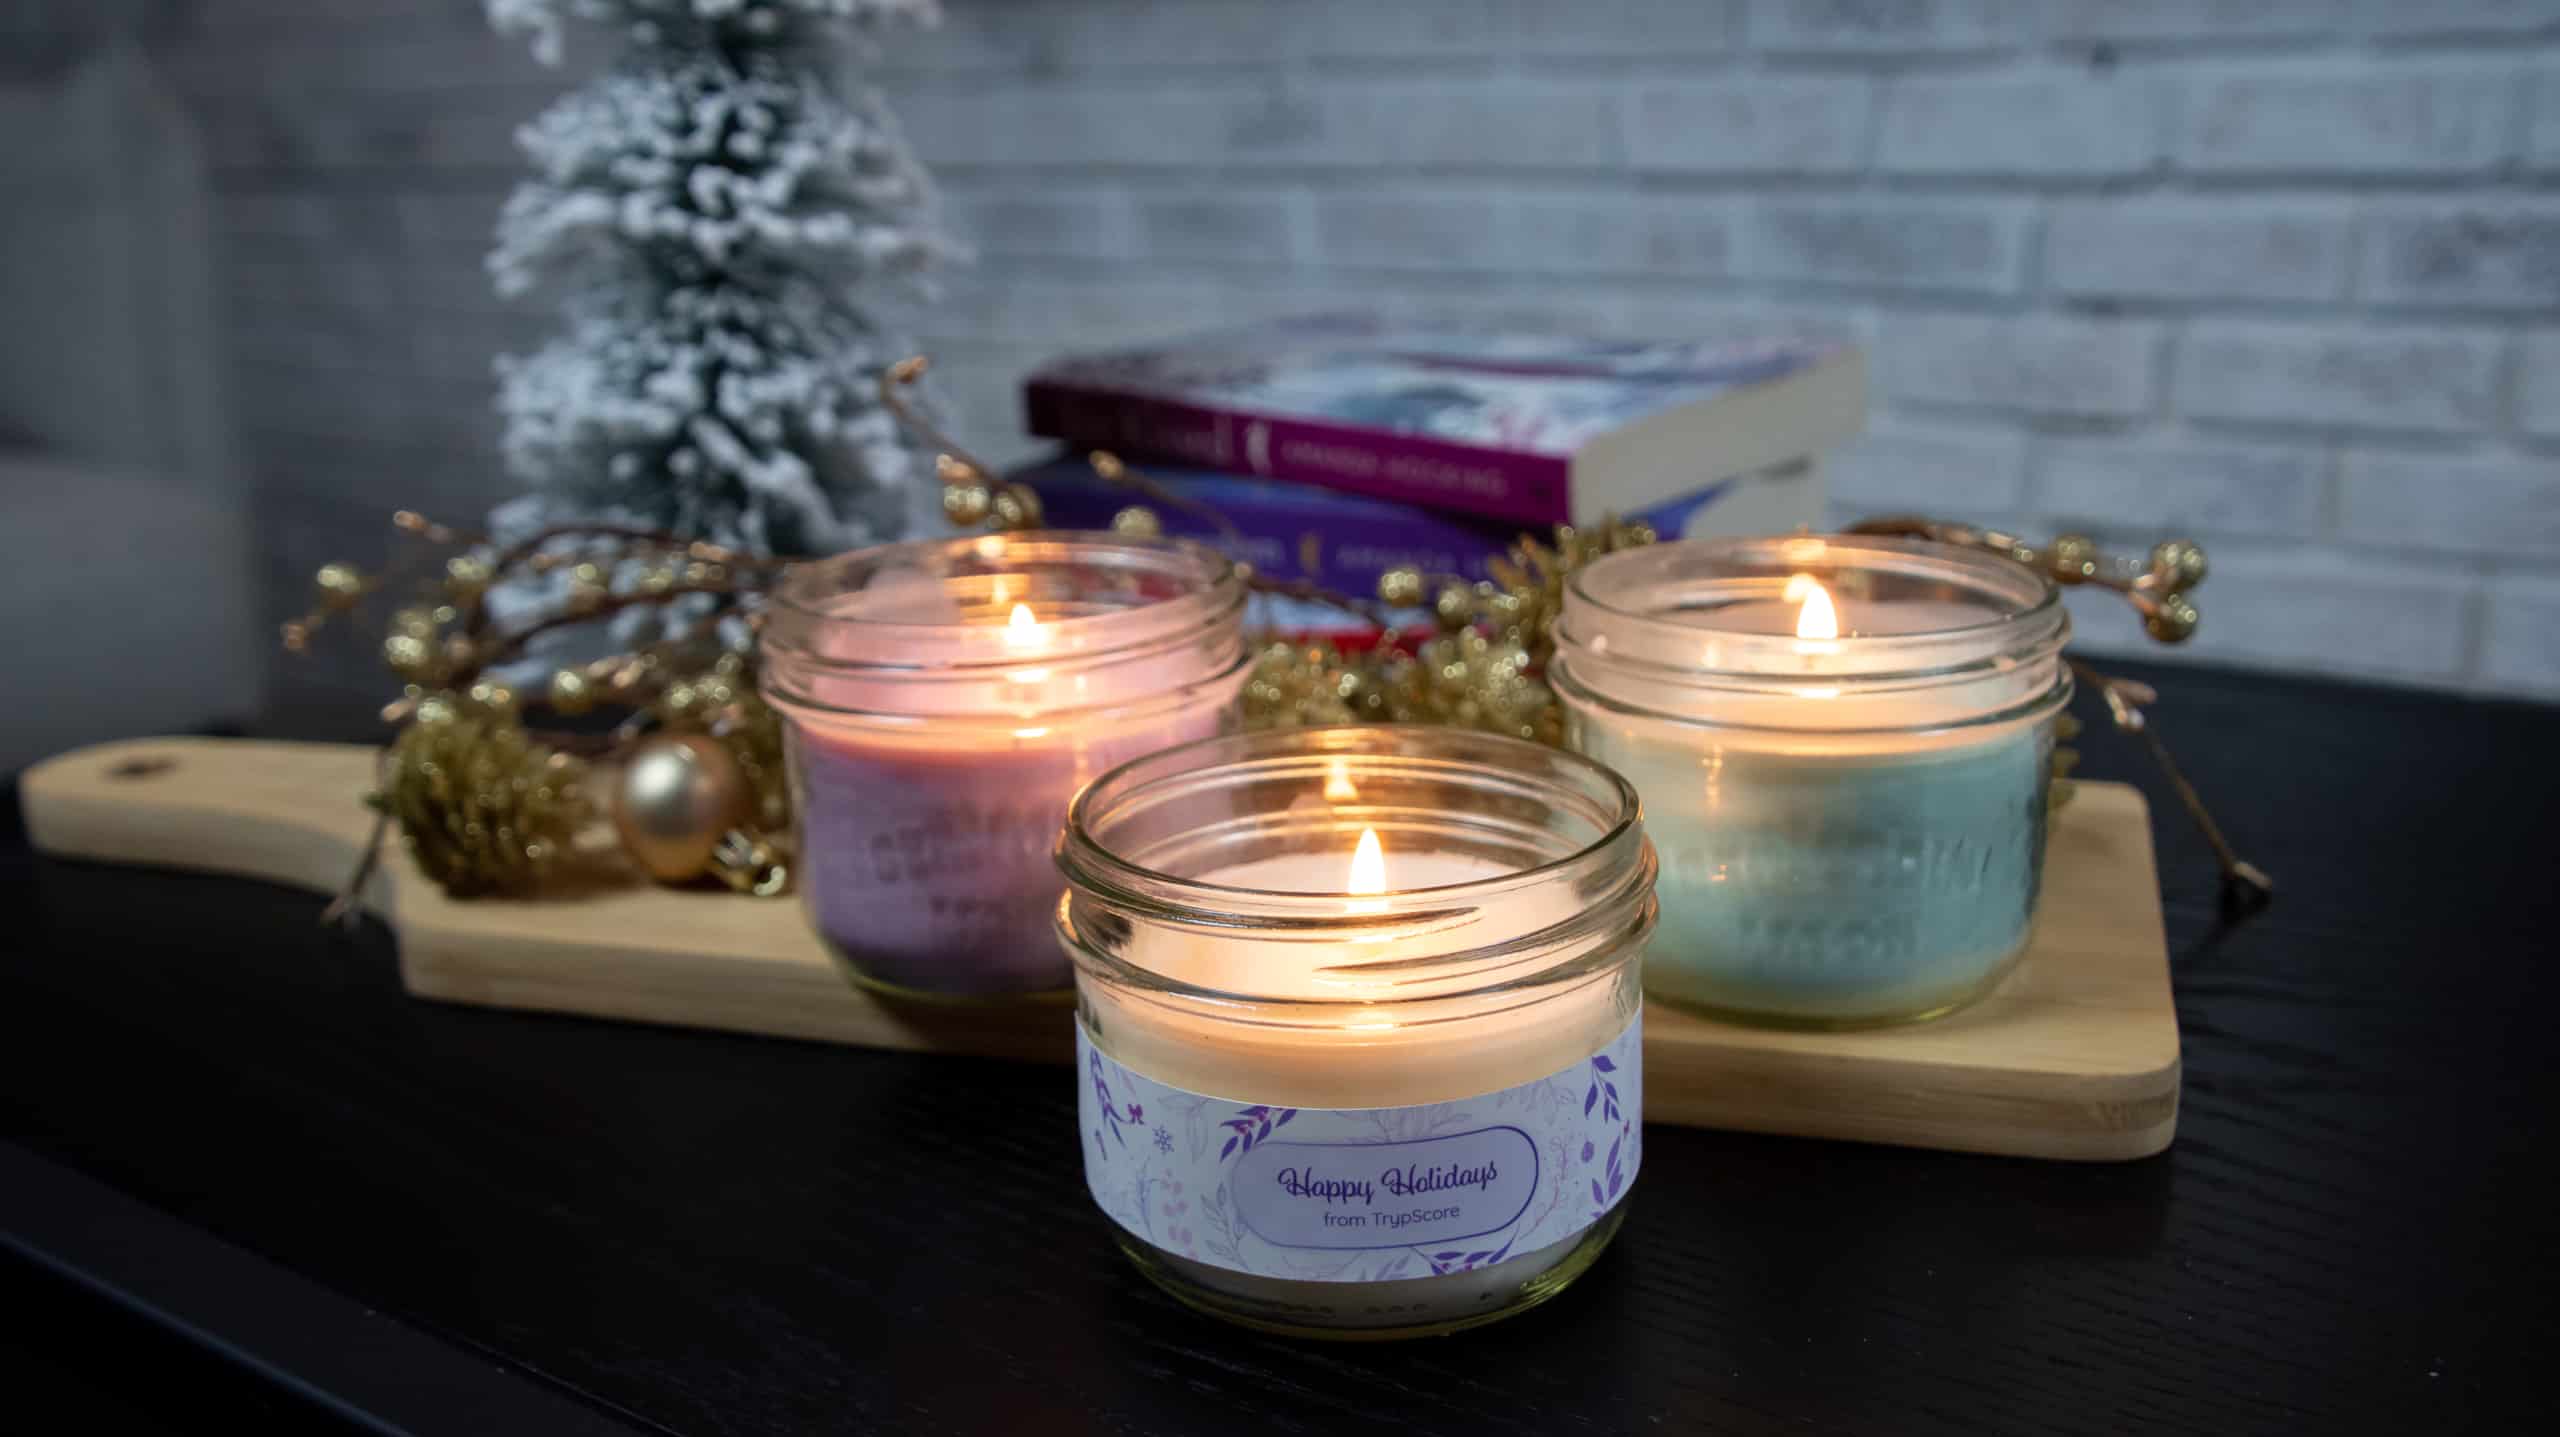
White Candles: Winter Citrus (A combination of Lemongrass, Sweet Orange, and Peppermint) Blue Candles: Peppermint Purple Candle: Lavender
Step 1: Prep Your Container
Before melting wax or mixing scents, clean and fully dry your jars so they are prepped and ready to go.
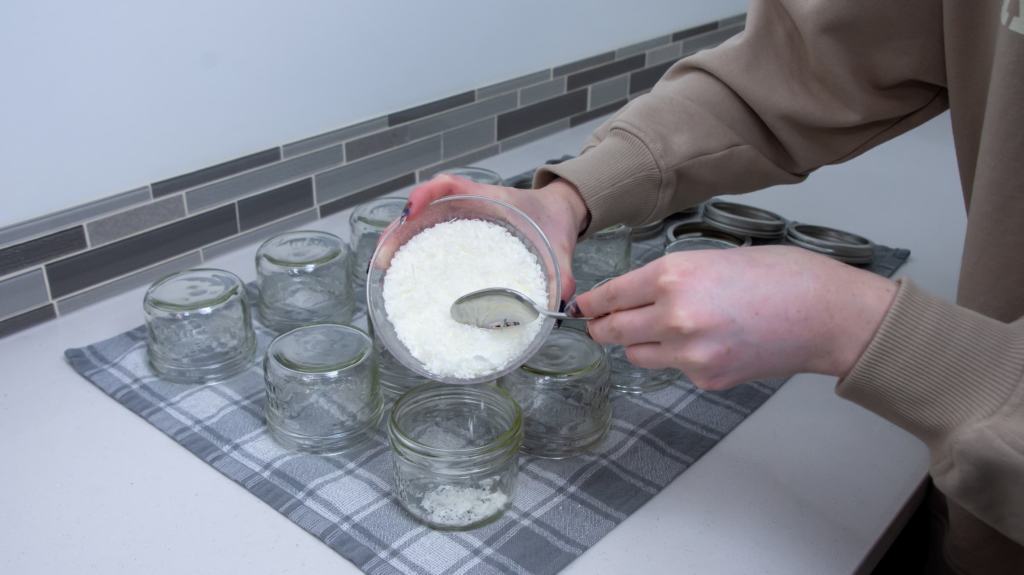
Step 2: Measure Wax
You can purchase a candle-making kit or purchase the supplies you need separately.
To determine how much wax you’ll need for each candle: fill your container with wax flakes up to where you want your candle surface to start. Pour the flakes into a pot and measure the same amount again. Because the flakes melt down so much, you’ll need two containers’ worth of flakes for each candle.
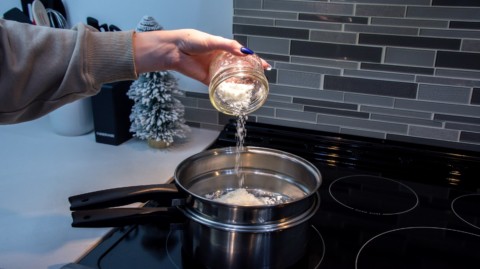
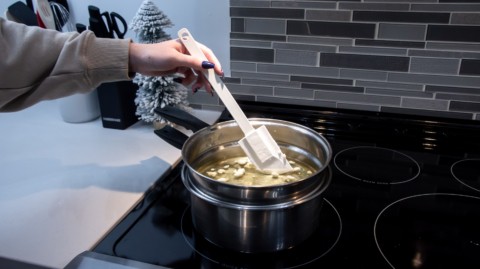
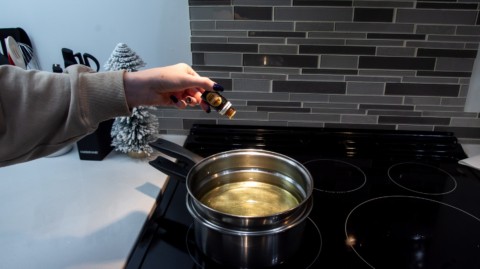
Step 3: Melt Wax and Add Scent/Color
Once you’ve measured out the wax flakes, melt them down on medium heat using a double boiler (if you don’t have one, you can use a metal bowl on top of a saucepan filled with water).
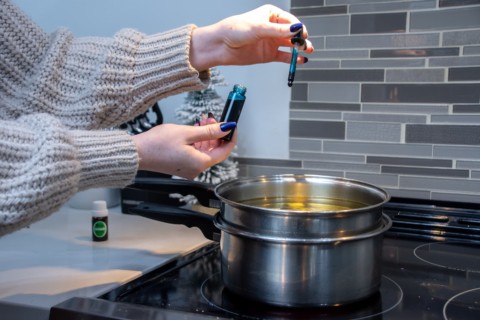
Slowly stir the flakes using a silicone spatula. Once the wax is completely melted, add 18 drops of essential oil(s) per candle. You can melt more than one candle at a time, so calculate the oils based on how many you’re melting at once! You can add more oil if you like having a stronger scent.
What we did: For our Winter Citrus DIY Candle, we melted enough wax for 8 candles and we added about 18 drops of the lemongrass essential oil, 18 drops of sweet orange, and 18 drops of lavender. If you are wanting to add coloring to your candle, use about 3 to 6 drops of gel food coloring or candle dye to the mixture (depending on how dark you want it to be). Pro tip: the melted blend will look dark, so use a piece of paper to test the true darkness of the the candle color.
NOTE: Do not use a water based food coloring, as it will not mix with the wax. We learned this the hard way!
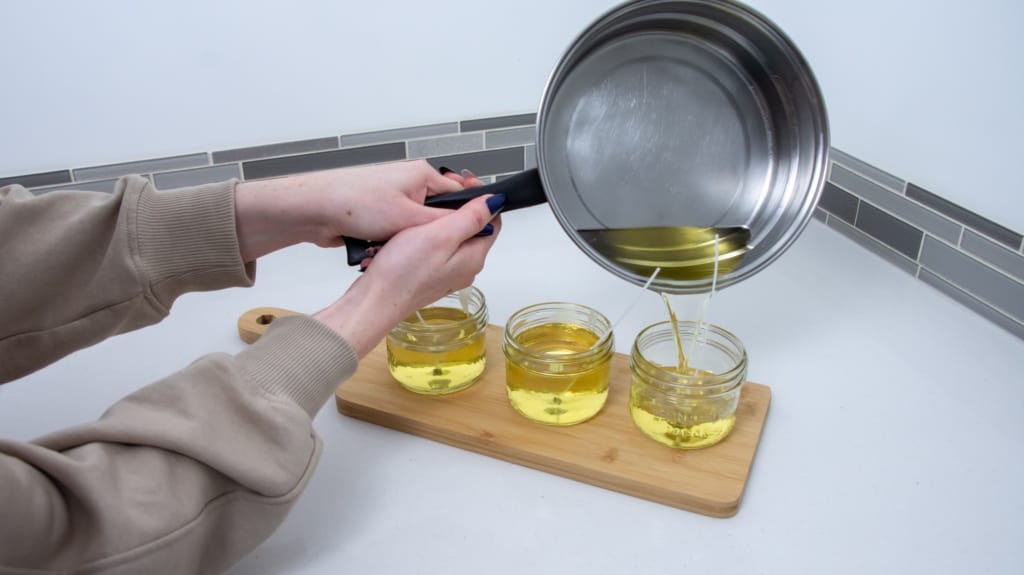
Step 4: Attach the wick and pour wax
Before pouring the candle, you’ll need to attach the wick to the bottom of the vessel. Each wick should come with a flat metal bottom; use a glue gun to glue the metal portion of the wick and place it in the center of the bottom of your jar or container. Hold it in place until the glue starts to dry and the wick stands up on its own.
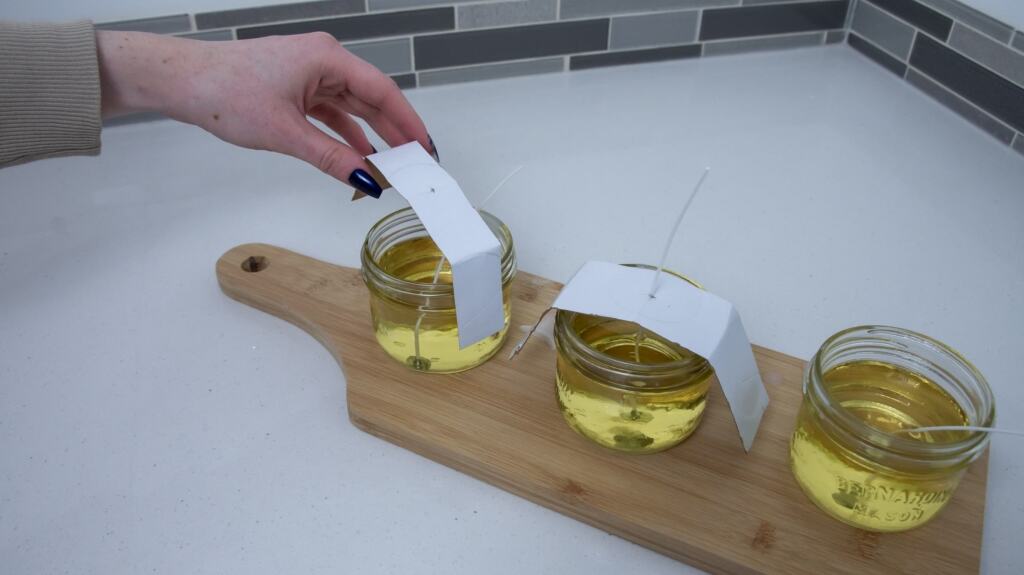
Then, carefully remove the wax from the heat and pour it into the container. To keep the candle wicks in an upright position, we created a stabilizing tool with cardboard while the candles set.
VERY important:DO NOT pour the unused wax down your drain; use a paper towel and wipe out the excess wax that’s left in the pot.
Step 5: Let it set
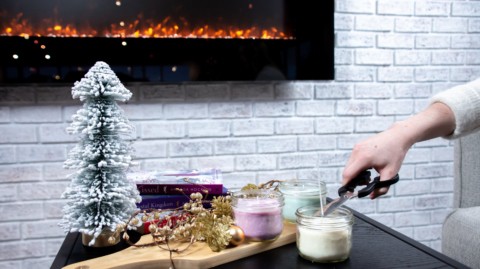
It will take several hours for the wax to completely harden again, so let the candles sit overnight. When the candle has set, you can use scissors to trim the wick. Cut the wick length to about ¼ of an inch.
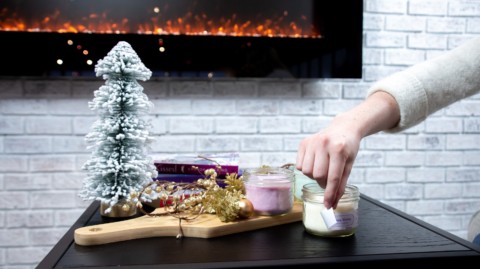
Step 6: Decorate the candle
The final step is a fun one! Use your imagination to create a label yourself or you can also look to purchase pre-made labels online. You could also paint the jars or do anything else you like to create your perfect holiday themed DIY candle!
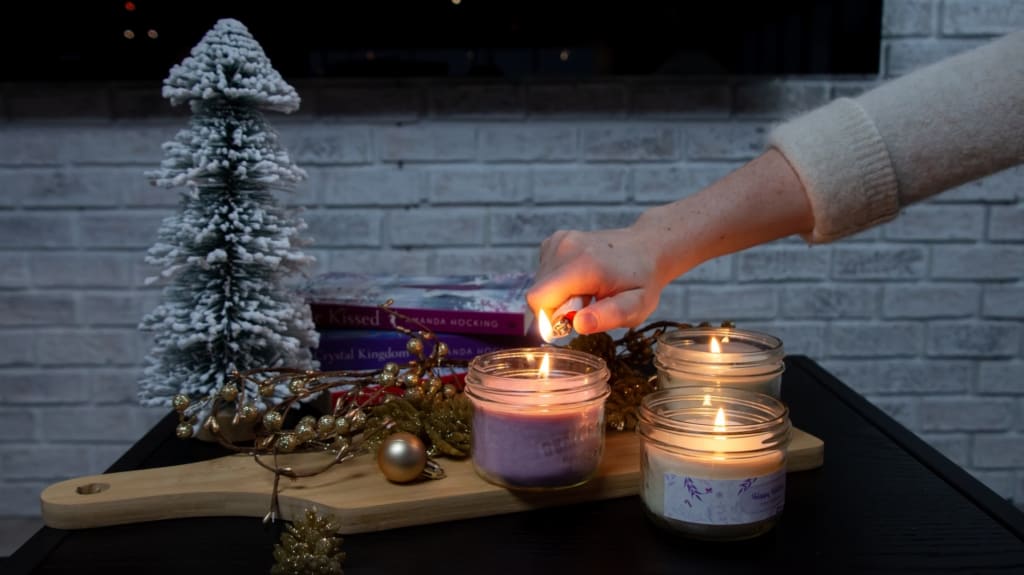
Now light your candle and let the aroma fill your home…or wrap it up to give it as a gift!
We hope you have fun creating this festive and fun project! If you’re looking for more holiday content, make sure to check out our top 6 tips to throw the best holiday party of the year! And if you recreate this DIY Candle, please tag us on Instagram so we can see your candle creations. Happy Holidays!